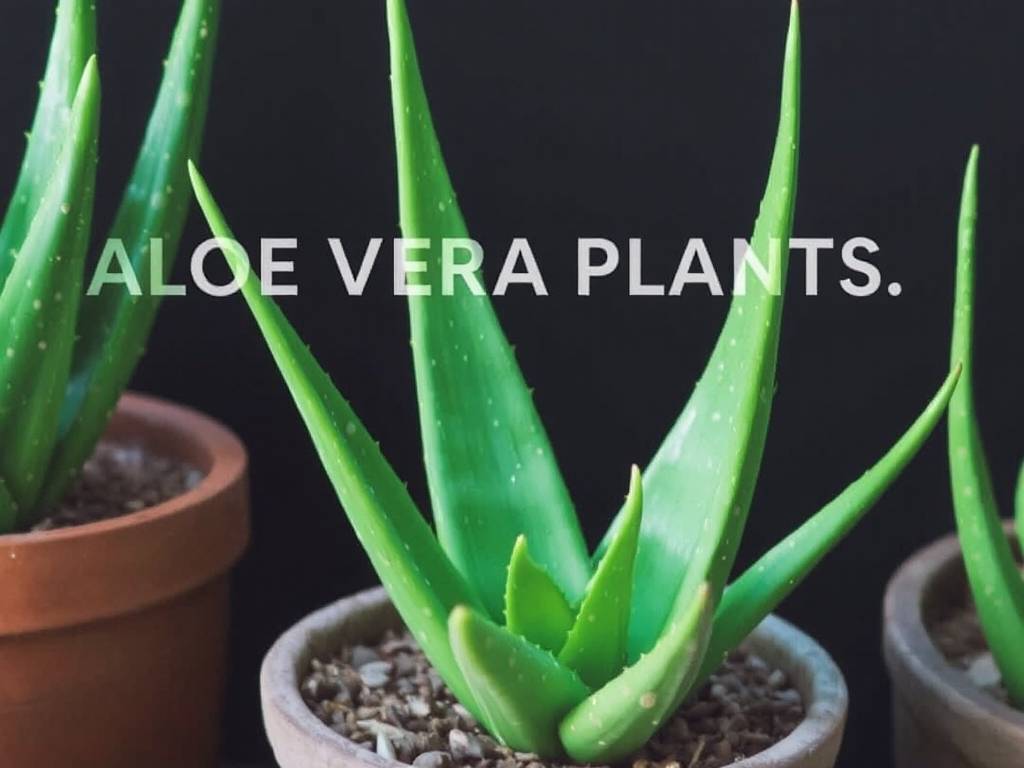
If you’ve ever wanted a low-maintenance houseplant that’s as useful as it is attractive, aloe vera is the perfect choice. This succulent not only adds a touch of greenery to your home but also produces a gel that’s great for soothing minor burns, dry skin, and even sunburns. But while aloe vera is known for being easy to care for, it still needs the right conditions to thrive indoors. Many new plant parents wonder: How do I keep my indoor aloe vera healthy? What mistakes should I avoid? How often should I water it, and where should I put it? In this guide, we’ll answer all these questions and more, covering every aspect of indoor aloe vera care—from choosing the right pot to troubleshooting common issues. By the end, you’ll have all the tools you need to help your aloe vera grow strong, produce new pups, and stay vibrant for years.
First, let’s start with the basics: understanding aloe vera’s natural habitat. Aloe vera is native to arid regions of North Africa, like Somalia and Sudan, where it grows in sandy, well-draining soil and soaks up plenty of sunlight. This means that indoors, it has three non-negotiable needs: bright light, well-draining soil, and infrequent watering. Ignore any of these, and your aloe vera might start to show signs of stress—like yellowing leaves, mushy stems, or stunted growth. Let’s break down each need step by step, so you can replicate its natural environment as closely as possible.
Light: Give Your Aloe Vera Plenty of Bright, Indirect Sunlight
One of the most common mistakes new aloe parents make is not giving their plant enough light. Aloe vera is a sun-loving succulent, so it needs at least 4–6 hours of bright, indirect sunlight every day to thrive. If you put it in a dark corner or a room with only low light, it will start to stretch (a process called “etiolation”)—its stems will grow long and thin, reaching for the light, and its leaves will lose their 饱满 (plumpness) and vibrant green color. Over time, a light-starved aloe vera may even stop growing altogether.
So where’s the best spot for your indoor aloe vera? Look for a south-facing window—this direction gets the most consistent sunlight throughout the day, which aloe vera loves. If you don’t have a south-facing window, an east or west-facing window works too, but you may need to adjust: east-facing windows get morning sun (which is gentler) and afternoon shade, while west-facing windows get afternoon sun (which can be intense in summer). If you use a west-facing window, keep an eye on your aloe vera during hot months—too much direct, harsh sunlight can scorch its leaves, leaving brown, crispy spots. If you notice this, move the plant a few feet back from the window or use a sheer curtain to filter the light.
What if you live in a home with limited natural light? Don’t worry—you can use artificial light to supplement. A full-spectrum LED grow light is a great option; place it 12–18 inches above the aloe vera and set it on a timer for 10–12 hours a day. This will mimic natural sunlight and keep your plant healthy. Avoid using regular incandescent bulbs, though—they produce too much heat and not enough of the light spectrum aloe vera needs.
Soil: Choose Well-Draining Soil to Prevent Root Rot
Root rot is the number one killer of indoor aloe vera plants—and it almost always happens because of poor soil. Aloe vera’s roots hate sitting in wet, soggy soil; they need soil that drains quickly so excess water can escape. If you use regular potting soil (which is designed to retain moisture for flowering plants), your aloe vera’s roots will suffocate and rot, leading to mushy stems, yellow leaves, and a plant that’s hard to save.
So what kind of soil is best for indoor aloe vera? The ideal mix is a well-draining succulent or cactus soil. You can buy pre-made succulent soil at most garden centers, but if you want to make your own, here’s a simple recipe: mix 2 parts potting soil, 1 part perlite (or pumice), and 1 part coarse sand. Perlite and sand help create air pockets in the soil, allowing water to drain quickly and preventing the roots from staying wet. Avoid adding peat moss or vermiculite to the mix—these retain too much moisture, which is bad for aloe vera.
Another thing to keep in mind: the soil should be loose, not compacted. When you repot your aloe vera (more on that later), gently pat the soil around the roots but don’t pack it down tightly. Compacted soil traps water and air, making it hard for the roots to breathe.
Watering: Less Is More—Avoid Overwatering
Overwatering is the biggest mistake people make with aloe vera. Because it’s a succulent, aloe vera stores water in its thick, fleshy leaves—so it can go weeks without being watered. In fact, it’s better to underwater your aloe vera than to overwater it; an underwatered aloe vera will show signs of stress (like wilted, wrinkled leaves) that are easy to fix with a drink, but an overwatered one may have root rot, which is often irreversible.
So how often should you water your indoor aloe vera? The answer depends on a few factors: the size of the pot, the type of soil, the amount of light it gets, and the temperature of your home. As a general rule, water your aloe vera only when the top 2–3 inches of soil are completely dry. To check if it’s time to water, stick your finger into the soil—if it feels dry up to your second knuckle, it’s time. In the summer, when the plant is growing and the weather is warm, you may need to water every 2–3 weeks. In the winter, when the plant goes dormant (grows more slowly), you may only need to water once a month or even less.
When you water your aloe vera, do it thoroughly. Pour water slowly into the soil until it starts to drain out of the bottom of the pot. This ensures that the water reaches the roots, not just the top layer of soil. Avoid watering the leaves—water sitting in the center of the plant (where the leaves meet the stem) can cause rot. Also, make sure to empty the saucer under the pot after watering—don’t let the plant sit in standing water, as this will lead to root rot.
What if you notice your aloe vera’s leaves are wilted or wrinkled? That’s a sign it’s thirsty. Give it a thorough watering, and within a day or two, the leaves should plump back up. If the leaves are yellow, mushy, or translucent, that’s a sign of overwatering. In this case, stop watering immediately and check the roots—if they’re brown and mushy, you may need to repot the plant in fresh, dry soil (more on troubleshooting root rot later).
Potting: Choose the Right Pot Size and Material
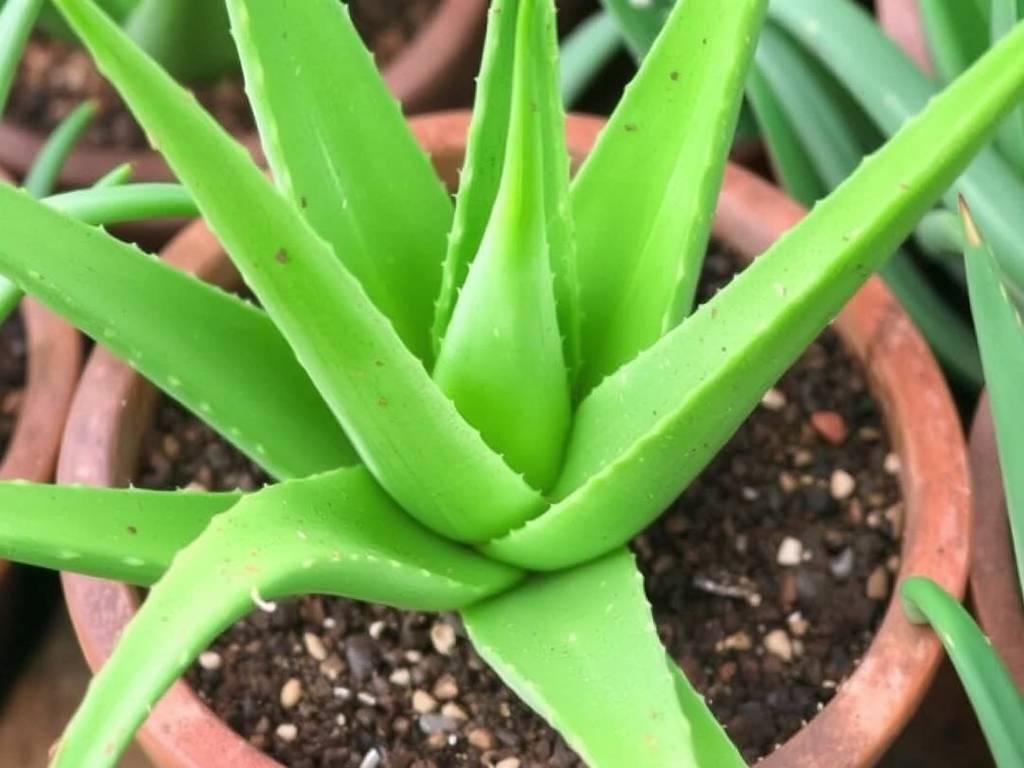
The pot you choose for your indoor aloe vera is just as important as the soil and water. Aloe vera has a shallow root system, so it doesn’t need a deep pot—instead, choose a pot that’s wide enough to accommodate the plant’s roots and has plenty of drainage holes. Drainage holes are non-negotiable—they allow excess water to escape, preventing root rot. If you fall in love with a pot that doesn’t have drainage holes, you can drill a few holes in the bottom (just make sure it’s made of a material that can be drilled, like ceramic or plastic).
What size pot should you use? A good rule of thumb is to choose a pot that’s 1–2 inches larger in diameter than the plant’s root ball. If you use a pot that’s too big, the soil will take longer to dry out, increasing the risk of overwatering. For example, if your aloe vera is currently in a 6-inch pot, repot it into an 8-inch pot when it outgrows the current one.
When it comes to material, terracotta pots are a great choice for aloe vera. Terracotta is porous, which means it absorbs excess moisture from the soil, helping the soil dry out faster. This is perfect for aloe vera, as it prevents the roots from staying wet. Plastic pots are also an option—they’re lightweight and affordable—but they don’t absorb moisture, so you’ll need to be extra careful not to overwater. Avoid glass pots or decorative pots without drainage holes—these trap water and are almost guaranteed to cause root rot.
Repotting: When and How to Repot Your Aloe Vera
Aloe vera grows slowly, so you won’t need to repot it very often—usually every 2–3 years, or when you notice the roots starting to grow out of the drainage holes or the plant becoming too big for its pot. Repotting is best done in the spring or summer, when the plant is actively growing—this gives it time to adjust to its new pot before going dormant in the winter.
Here’s how to repot your indoor aloe vera:
Prepare the new pot: Choose a pot that’s 1–2 inches larger in diameter than the current one, with drainage holes. Fill the bottom of the pot with 1–2 inches of well-draining succulent soil.
Remove the plant from its current pot: Gently tap the sides of the pot to loosen the soil, then carefully pull the plant out by the base of the stem. If the plant is stuck, you can use a knife to loosen the soil around the edges, but be careful not to damage the roots.
Inspect the roots: Once the plant is out of the pot, gently shake off excess soil to reveal the roots. Check for any signs of root rot—brown, mushy roots—and trim them off with clean, sharp scissors or pruning shears. If most of the roots are rotted, you may need to take cuttings to propagate a new plant (more on propagation later).

Place the plant in the new pot: Set the plant in the center of the new pot, making sure that the base of the stem is level with the top of the soil (don’t bury the stem too deep—this can cause rot). Add more succulent soil around the roots, gently patting it down to hold the plant in place. Leave a 1-inch gap between the top of the soil and the rim of the pot to prevent water from spilling over when you water.
Water lightly: After repotting, give the plant a light watering to help the soil settle around the roots. Don’t water too much—wait until the top 2–3 inches of soil are dry before watering again.
Temperature and Humidity: Keep It Warm and Dry
Aloe vera thrives in warm, dry conditions—just like its native desert habitat. The ideal temperature for indoor aloe vera is between 60–80°F (15–27°C). It can tolerate temperatures as low as 50°F (10°C) for short periods, but prolonged exposure to cold temperatures (below 40°F/4°C) will damage the plant, causing the leaves to turn brown and mushy. So keep your aloe vera away from drafty windows, doors, or air conditioning vents—these can cause sudden temperature drops.
Humidity is another factor to consider. Aloe vera doesn’t like high humidity—too much moisture in the air can cause the leaves to rot, especially if the plant isn’t getting enough light. Most indoor environments have humidity levels between 30–50%, which is perfect for aloe vera. If you live in a very humid area (like a tropical climate), you can improve air circulation around the plant by placing a fan nearby or opening a window (as long as it’s not drafty). Avoid placing your aloe vera in bathrooms or kitchens, where humidity levels are often higher.
Fertilizing: Feed Sparingly, If At All
Aloe vera is not a heavy feeder—so you don’t need to fertilize it very often. In fact, too much fertilizer can damage the plant, causing the leaves to turn brown or the roots to burn. If you do choose to fertilize, do it only during the growing season (spring and summer), when the plant is actively growing. Skip fertilizing in the fall and winter, when the plant is dormant.
What kind of fertilizer should you use? A balanced, water-soluble fertilizer designed for succulents or cacti is best. Dilute the fertilizer to half the strength recommended on the package—this will prevent overfertilization. For example, if the package says to mix 1 teaspoon of fertilizer per gallon of water, use ½ teaspoon per gallon. Fertilize your aloe vera once every 4–6 weeks during the growing season, and that’s it.
If you don’t have succulent fertilizer, you can use a balanced houseplant fertilizer (like 10-10-10) diluted to half strength, but succulent fertilizer is better because it has lower nitrogen levels (nitrogen can cause the plant to grow too quickly, making it weak).
Propagating Aloe Vera: Grow New Plants from Pups or Cuttings
One of the best things about aloe vera is that it’s easy to propagate—so you can grow new plants from your existing one, either to share with friends or to replace a plant that’s struggling. The two most common ways to propagate aloe vera are from “pups” (baby plants that grow at the base of the mother plant) and from leaf cuttings.
Propagating from Pups
Pups are small, baby aloe vera plants that grow from the roots of the mother plant. They’re the easiest way to propagate aloe vera, as they already have their own roots and are more likely to survive than cuttings. Here’s how to do it:
Wait for the pups to grow: Pups should be at least 2–3 inches tall and have a few of their own leaves before you separate them from the mother plant. If you separate them too early, they may not have enough roots to survive.
Remove the mother plant from its pot: Gently take the mother plant out of its pot and shake off excess soil to reveal the pups and their roots.
Separate the pups: Use a clean, sharp knife or your hands to gently separate the pups from the mother plant. Make sure each pup has at least a few roots attached—if a pup doesn’t have roots, it may not survive (but you can still try propagating it as a cutting).
Let the pups callus over: Place the separated pups in a warm, dry place (out of direct sunlight) for 1–2 days. This allows the cut end to form a callus, which prevents rot when you plant them.
Plant the pups: Fill small pots (3–4 inches in diameter) with well-draining succulent soil. Make a small hole in the soil, place the pup in the hole, and gently pat the soil around it. Water lightly, then wait until the top 2 inches of soil are dry before watering again.
Care for the new plants: Place the new pups in a bright, indirect light spot and keep them in warm temperatures (60–80°F). They should start growing new leaves within a few weeks.
")
Propagating from Leaf Cuttings
If your aloe vera doesn’t have any pups, you can propagate it from leaf cuttings. This method is a bit trickier than propagating from pups, as not all cuttings will root, but it’s still worth trying. Here’s how:
Choose a healthy leaf: Select a thick, mature leaf from the bottom of the plant (avoid young, small leaves). Use a clean, sharp knife to cut the leaf off at the base of the stem.
Let the cutting callus over: Place the leaf cutting in a warm, dry place (out of direct sunlight) for 3–5 days. The cut end needs to form a callus—if you plant it without a callus, it will rot.
Plant the cutting: Fill a small pot with succulent soil. Make a small hole in the soil, dip the callused end of the cutting in rooting hormone (optional, but it can help speed up rooting), and place it in the hole. Gently pat the soil around the cutting—only bury the bottom 1–2 inches of the leaf (don’t bury the entire leaf).
Water sparingly: Water the soil lightly, then wait until the top 2 inches of soil are completely dry before watering again. Too much water will cause the cutting to rot.
Wait for roots to grow: It can take 4–6 weeks for the cutting to develop roots. You’ll know it’s rooting if you see new growth at the base of the leaf or if the cutting feels firm when you gently tug on it. Once roots have formed, you can care for it like a mature aloe vera plant.
Troubleshooting Common Indoor Aloe Vera Problems
Even with the best care, your aloe vera may run into a few issues. Here are the most common problems and how to fix them:
1. Yellow, Mushy Leaves (Overwatering/Root Rot)
As we mentioned earlier, yellow, mushy leaves are almost always a sign of overwatering or root rot. To fix this:
2. Wilted, Wrinkled Leaves (Underwatering)
Wilted, wrinkled leaves mean your aloe vera is thirsty. Fix this by giving the plant a thorough watering—pour water until it drains out of the bottom of the pot. The leaves should plump back up within 1–2 days. To prevent underwatering, check the soil every 1–2 weeks and water when the top 2–3 inches are dry.
3. Stretched, Leggy Growth (Not Enough Light)
If your aloe vera is growing tall and thin with widely spaced leaves, it’s not getting enough
light. This etiolation happens because the plant is stretching to reach for more sunlight, and it can weaken the plant over time. To fix this:
First, move your aloe vera to a brighter spot—preferably a south-facing window where it can get 4–6 hours of bright, indirect light daily. If natural light is limited, add a full-spectrum LED grow light set to 10–12 hours a day, positioned 12–18 inches above the plant.
You can also trim back the leggy growth if it bothers you: use clean, sharp scissors to cut off the stretched stems just above a healthy leaf cluster. This will encourage the plant to grow bushier, rather than taller, as it redirects energy to new growth. Just be sure not to remove more than one-third of the plant at a time, as this can stress it.
Brown, Crispy Spots on Leaves (Too Much Direct Sun or Low Humidity)
Brown, crispy spots on aloe vera leaves are often a sign of sunburn—this happens when the plant is exposed to intense, direct sunlight for too long, especially during hot summer afternoons. To fix sunburned leaves:
Move the plant a few feet back from the window or use a sheer curtain to filter the light. Avoid placing it in west-facing windows during peak sun hours (12–4 PM) in summer.
If the crispy spots are small, you can leave them—they won’t heal, but they also won’t harm the rest of the plant. If the spots are large and cover most of a leaf, trim the damaged part off with clean scissors to prevent the issue from spreading.
In some cases, brown, crispy leaf tips can also be caused by low humidity—though aloe vera prefers dry air, extremely low humidity (below 20%) can cause the edges of the leaves to dry out. If you notice this, you can lightly mist the air around the plant (not the leaves themselves) once a week to add a bit of moisture. Alternatively, place a tray of water and pebbles near the plant—evaporating water will increase humidity slightly without making the air too damp.
Soft, Translucent Leaves (Overwatering or Cold Damage)
Soft, translucent leaves are another red flag for overwatering—when the roots are waterlogged, they can’t absorb oxygen, and the leaves start to retain too much moisture, becoming squishy and see-through. If you suspect overwatering, follow the same steps as fixing root rot: stop watering, repot in fresh succulent soil, and trim any rotted roots.
Cold damage can also cause leaves to turn soft and translucent. If your aloe vera was exposed to temperatures below 40°F (4°C) for more than a few hours, the cells in the leaves may freeze and break down. To fix this:
Move the plant to a warm spot (60–80°F) away from drafts or cold windows. Trim off any severely damaged leaves (those that are completely soft and translucent) with clean scissors. Keep the soil on the dry side while the plant recovers—cold-damaged roots are more prone to rot if overwatered.
Pests (Mealybugs, Scale, or Spider Mites)
Aloe vera is relatively pest-resistant, but it can still attract common houseplant pests like mealybugs, scale, and spider mites—especially if it’s stressed from overwatering or poor light. Here’s how to identify and treat each:
Mealybugs: These small, white, cottony pests cluster in the crevices between leaves and stems. They suck sap from the plant, causing leaves to yellow and wilt. To treat: Wipe the pests off with a cotton swab dipped in rubbing alcohol. For severe infestations, spray the plant with a solution of 1 teaspoon neem oil, 1 teaspoon dish soap, and 1 quart of water—repeat every 7–10 days until the pests are gone.
Scale: Scale insects look like small, brown or black bumps on the leaves and stems. They also suck sap, leading to yellowing leaves. To treat: Scrape off the scale with a fingernail or a soft brush, then wipe the leaves with neem oil to kill any remaining eggs.
Spider Mites: These tiny, red or brown pests are hard to see, but you’ll notice fine webbing on the undersides of leaves. They cause leaves to develop yellow spots and drop off. To treat: Rinse the plant thoroughly with a strong stream of water to knock off the mites. Then spray with neem oil solution (as above) every 5–7 days for 2–3 weeks.
To prevent pests, keep your aloe vera healthy (avoid overwatering and provide enough light) and inspect it regularly—catching infestations early makes them much easier to treat.
Harvesting and Using Aloe Vera Gel Safely
One of the best perks of growing aloe vera indoors is having fresh, natural gel on hand for soothing skin issues like minor burns, sunburns, dryness, or insect bites. But it’s important to harvest and use the gel correctly to avoid irritation. Here’s how:
Choose the Right Leaves: Harvest leaves from the bottom of the plant—these are the oldest and contain the most gel. Select leaves that are thick, plump, and free of damage (no brown spots or softness). Avoid harvesting more than 1–2 leaves at a time, as this can stress the plant.
Cut the Leaf Cleanly: Use a sharp, clean knife to cut the leaf at the base of the stem. Be careful—aloe vera leaves have small, sharp spines along the edges, so hold the leaf flat to avoid pricking your fingers.
Remove the Spines and Peel the Skin: Lay the leaf flat on a cutting board. Use the knife to trim off the spines along both edges. Then, make a lengthwise cut down the center of the leaf (just deep enough to cut through the outer skin). Gently peel back the skin to reveal the clear, gel-like substance inside.
Extract the Gel: Scoop out the gel with a spoon and place it in a clean bowl. You can use the gel immediately or store it in an airtight container in the refrigerator for up to 1 week. For longer storage, mix the gel with a few drops of vitamin E oil (to prevent oxidation) and freeze it in ice cube trays—this will keep for up to 6 months.
Test for Irritation: Before using aloe vera gel on your skin, do a patch test: apply a small amount of gel to the inside of your wrist and wait 24 hours. If you notice redness, itching, or swelling, don’t use it—some people are allergic to aloe vera.
How to Use the Gel:
Note: Do not ingest aloe vera gel unless it’s specifically labeled for internal use. The latex (the yellowish liquid that oozes from the leaf when cut) contains aloin, a laxative that can cause stomach cramps, diarrhea, or dehydration if consumed in large amounts.
Final Tips for Long-Term Indoor Aloe Vera Success
To keep your aloe vera healthy and thriving for years, remember these key takeaways:
With these simple steps, your indoor aloe vera will not only add a touch of green to your home but also provide you with fresh, natural gel whenever you need it. Whether you’re a new plant parent or a seasoned gardener, aloe vera is a forgiving, rewarding plant that’s sure to become a staple in your indoor garden.
发表评论